
How to tin a solder pad
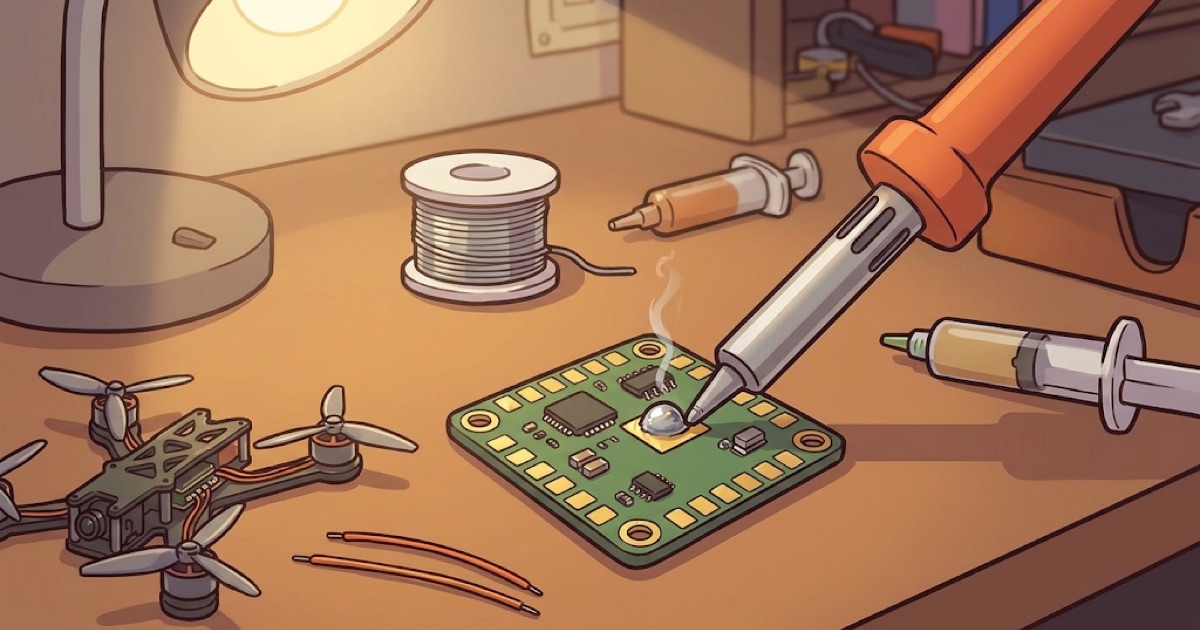
To tin a solder pad, put flux on it, press the soldering iron tip against the pad and feed solder until it fills the pad, then make a small circular motion with the tip and lift the iron away. The result you want is a smooth, shiny dome of solder covering the whole pad. Below is the full process step by step, with temperatures, tip choice and the mistakes every beginner runs into.
Tinning is the first skill in FPV drone soldering: without it you can't attach a thin wire to a flight controller, motor wires to an ESC, or a power lead.
What tinning is and why it matters
Tinning means coating metal with a thin layer of solder before the actual joint. A tinned pad and a tinned wire join in a second: melt the solder and the two layers flow together. Soldering “dry” takes much longer heating — the board overheats and the wire strands splay out.
So the main rule: tin both the pads and the wires — always both.
What you need
- A soldering iron with adjustable temperature and replaceable tips.
- A BC2 tip for small pads and thin wires, a C4 tip for large ones.
- Flux. Good solder already has flux inside, but it burns off during long heating, so for clean joints add it separately.
- Thin solder wire, 0.5–0.8 mm.
- A sponge or brass wool to clean the tip.
- A board to practise on. Any old board works; a practice board with pads of different sizes, like on real FPV boards, is even better.
Temperature and tip
| What you solder | Tip | Temperature |
|---|---|---|
| Thin signal wires (30–28 AWG), small pads | BC2 | 310–320 °C |
| Motor wires (20–18 AWG), power leads (14–12 AWG) | C4 | 380–390 °C |
Don't go hotter: the higher the temperature, the faster the tip turns black and wears out.
How to tin a solder pad: step by step
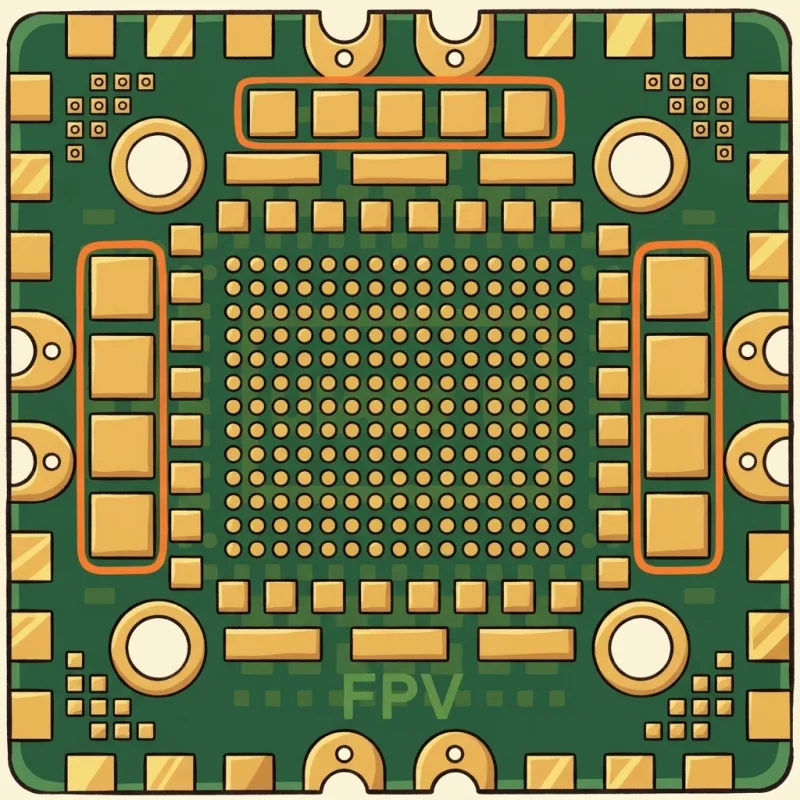
Start with the largest pads — they are the easiest to learn on.
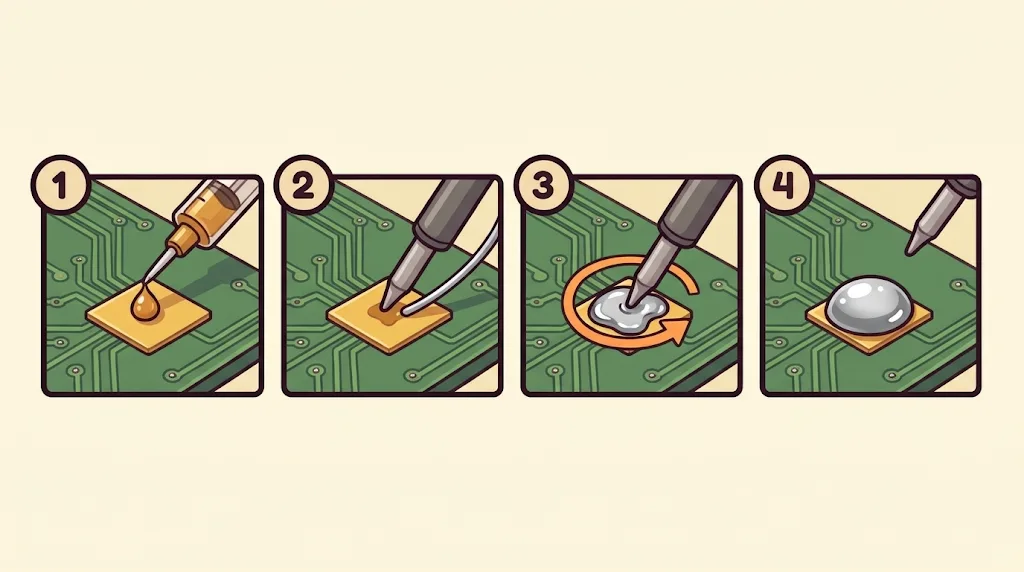
- Apply flux to the pad. Not much — a thin layer.
- Press the tip of the iron against the pad so it heats up.
- Feed solder onto the pad itself, not onto the tip. The tip heats the pad, the pad melts the solder — that's how it flows evenly.
- When the solder has filled the pad, move the tip in a small circle, as if testing a pen, and lift the iron away.
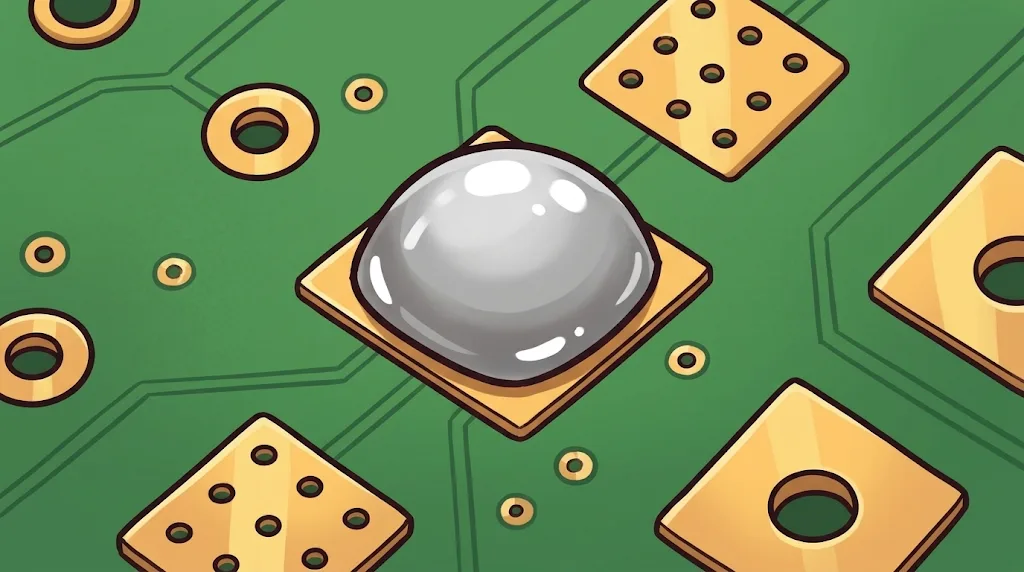
- You should get a solder dome — a shiny half-sphere of solder over the whole pad.
Don't keep the iron on the board longer than 2–3 seconds. Large pads (for power leads) need more — then pause before the next pad. An overheated board can lose a pad: it simply lifts off.
How to tin a wire
Wires are tinned before soldering too.
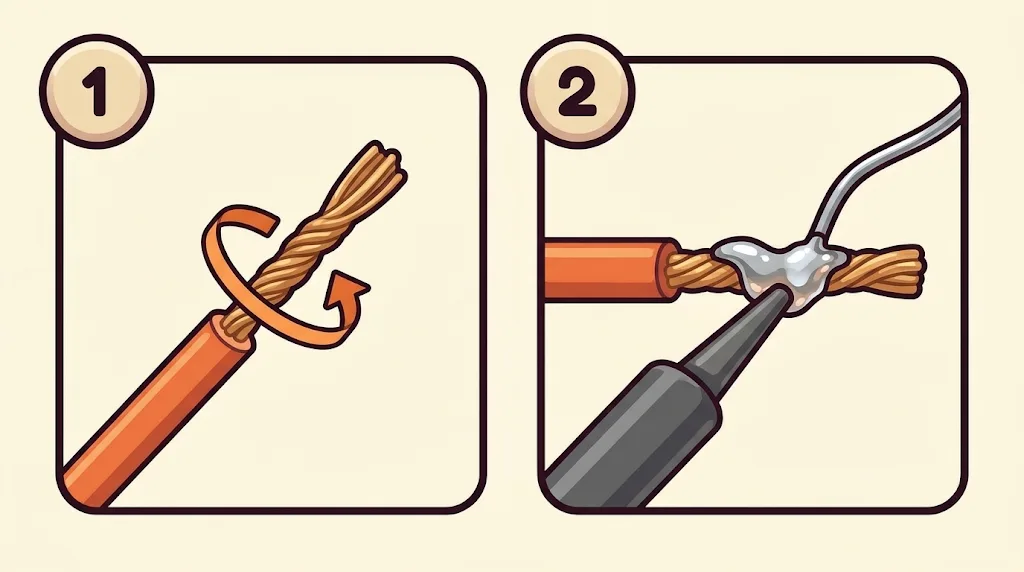
- Strip the insulation — no longer than the pad you'll solder to. Extra bare wire is one of the most common mistakes.
- Twist the bare strands so they don't fray.
- Apply flux.
- Tip on one side of the wire, solder on the other. The tip heats the wire, the wire melts the solder, and it wicks between the strands.
How to solder a tinned wire to the pad
Once both the pad and the wire are tinned:
- Bring the wire to the pad.
- Touch the tip to the pad and fully melt the solder on it.
- Dip the wire into the dome, remove the tip and hold the wire still for 2–3 seconds until the solder sets.
If the pad and tip size allow, heat the pad itself. If not, you can touch the tip to the wire — but don't press the wire into the pad with the tip: the force makes the strands splay out.
Didn't work or don't like how it looks? Add flux and resolder.
Common mistakes
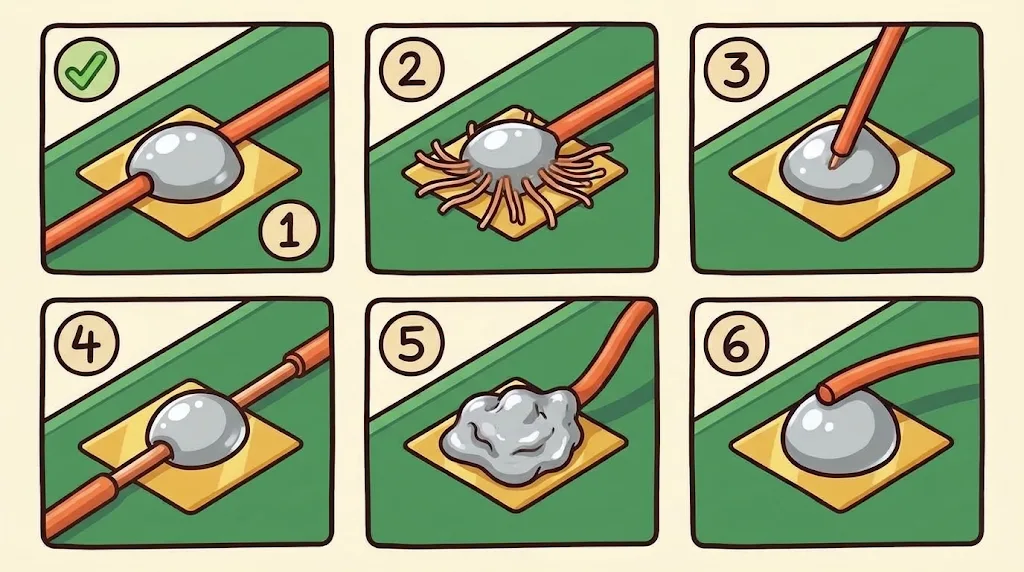
- Correct: the wire lies straight along the pad and is sunk into a smooth, shiny dome.
- The wire splayed out. It was pressed hard with the tip or wasn't tinned before soldering.
- The wire is at an angle and pokes out of the dome. Keep the wire straight along the pad while the solder sets.
- Too much insulation stripped. Bare wire outside the pad risks a short. Strip exactly the pad's length.
- The dome is lumpy and uneven. The solder wasn't fully melted or there wasn't enough flux.
- The wire isn't sunk into the dome. It just sits on top — such a joint will break off from vibration.
One more common problem: solder drags behind the tip — add flux and clean the tip.
Tip care
After every joint, wipe excess solder off the tip with a sponge or brass wool. Black oxide on the tip transfers heat poorly, and the solder stops behaving. Instead of a branded cleaner, an ordinary steel scrubber in a cut-down aluminium can works fine.
When you're done, clean flux residue and solder balls off the board with PCB cleaner or isopropyl alcohol (an old toothbrush helps).
Never leave a switched-on soldering iron unattended.
What's next
Once you're comfortable with large pads, move on to smaller ones and thin signal wires, then motor wires and power leads. The principle is the same: flux, tin both sides, quick heat without pressure.